


-
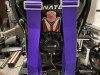
Main features of the build
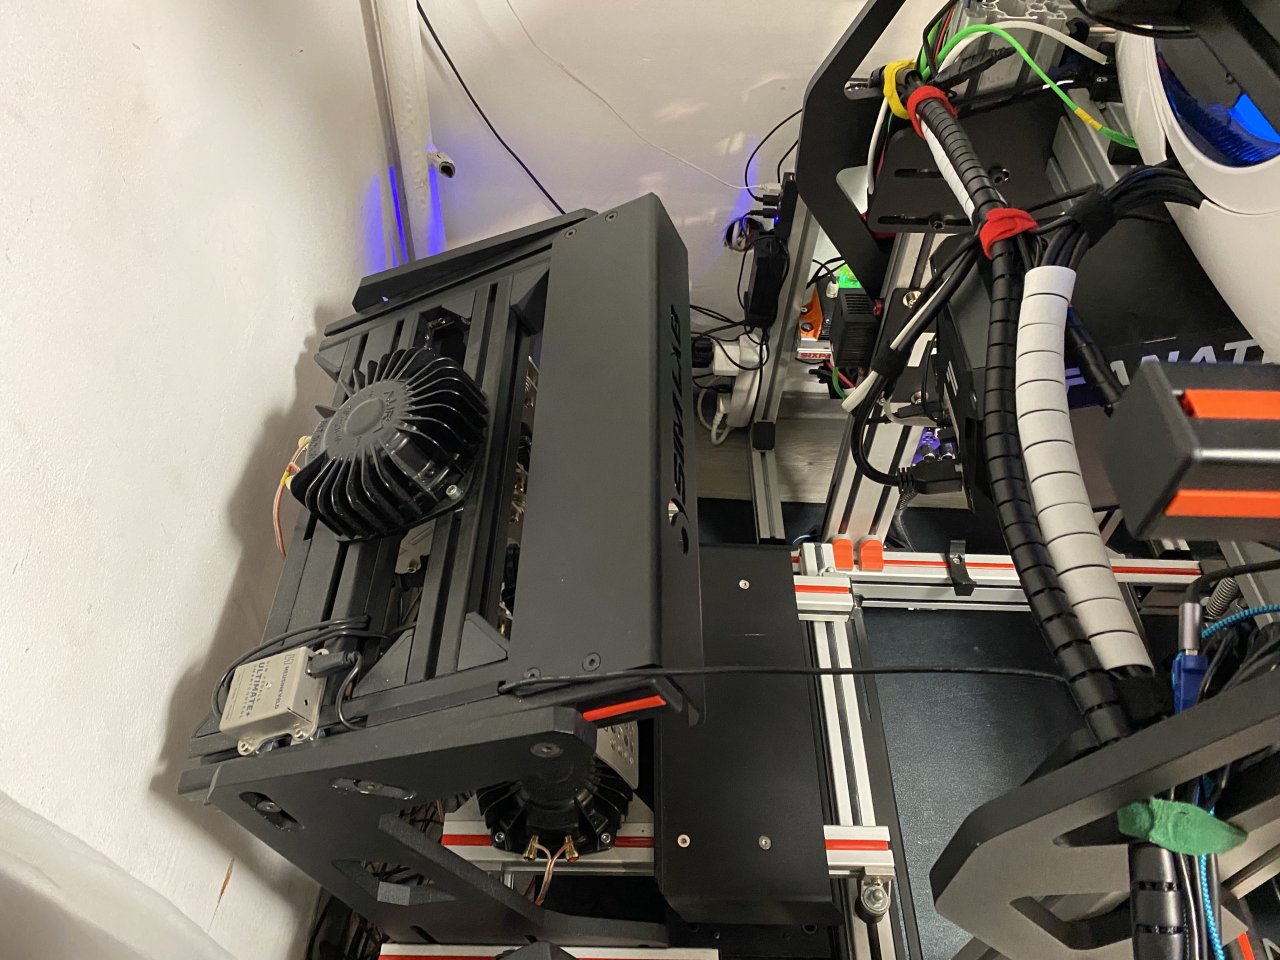
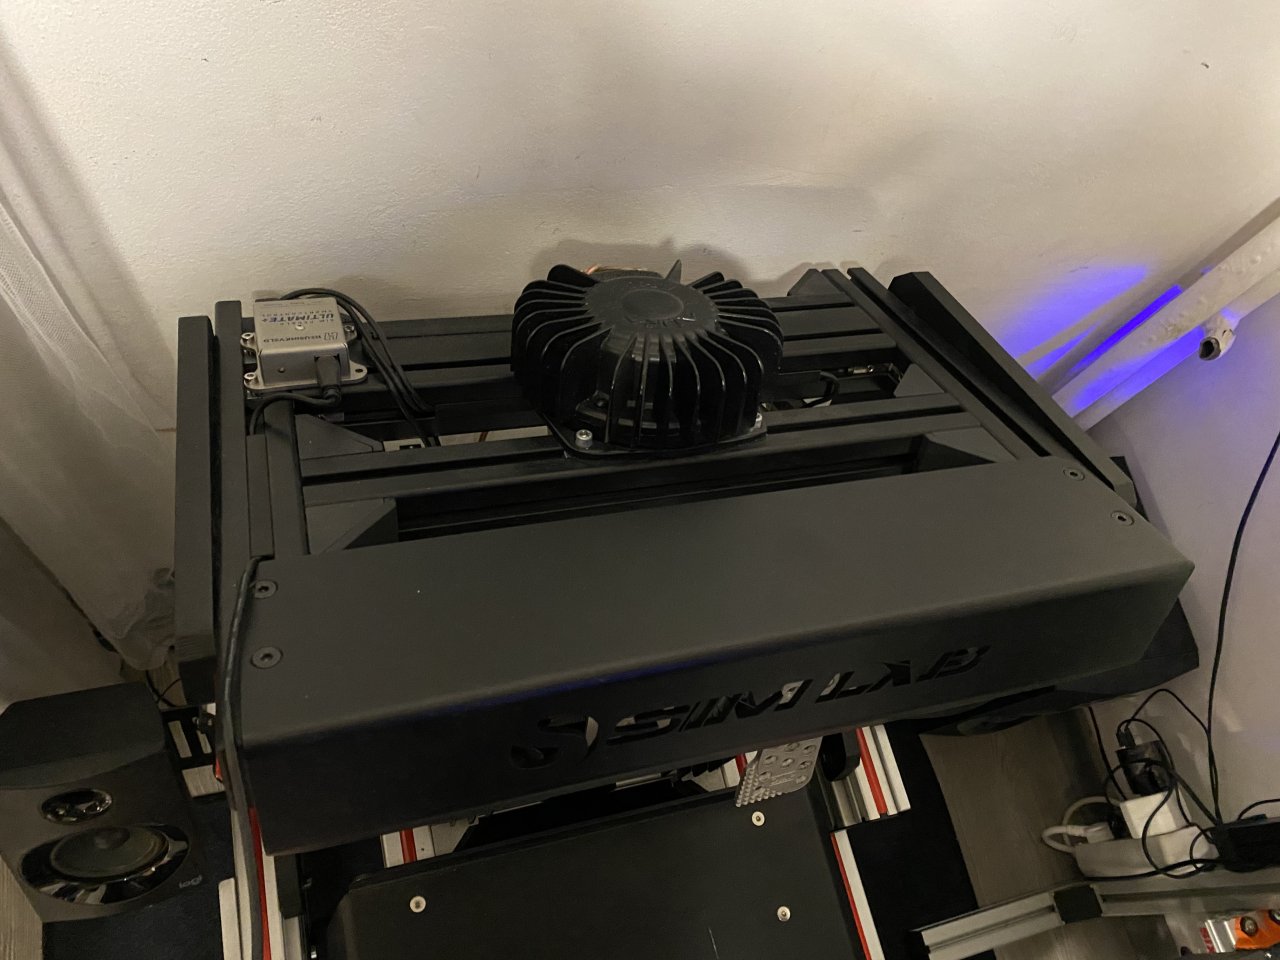
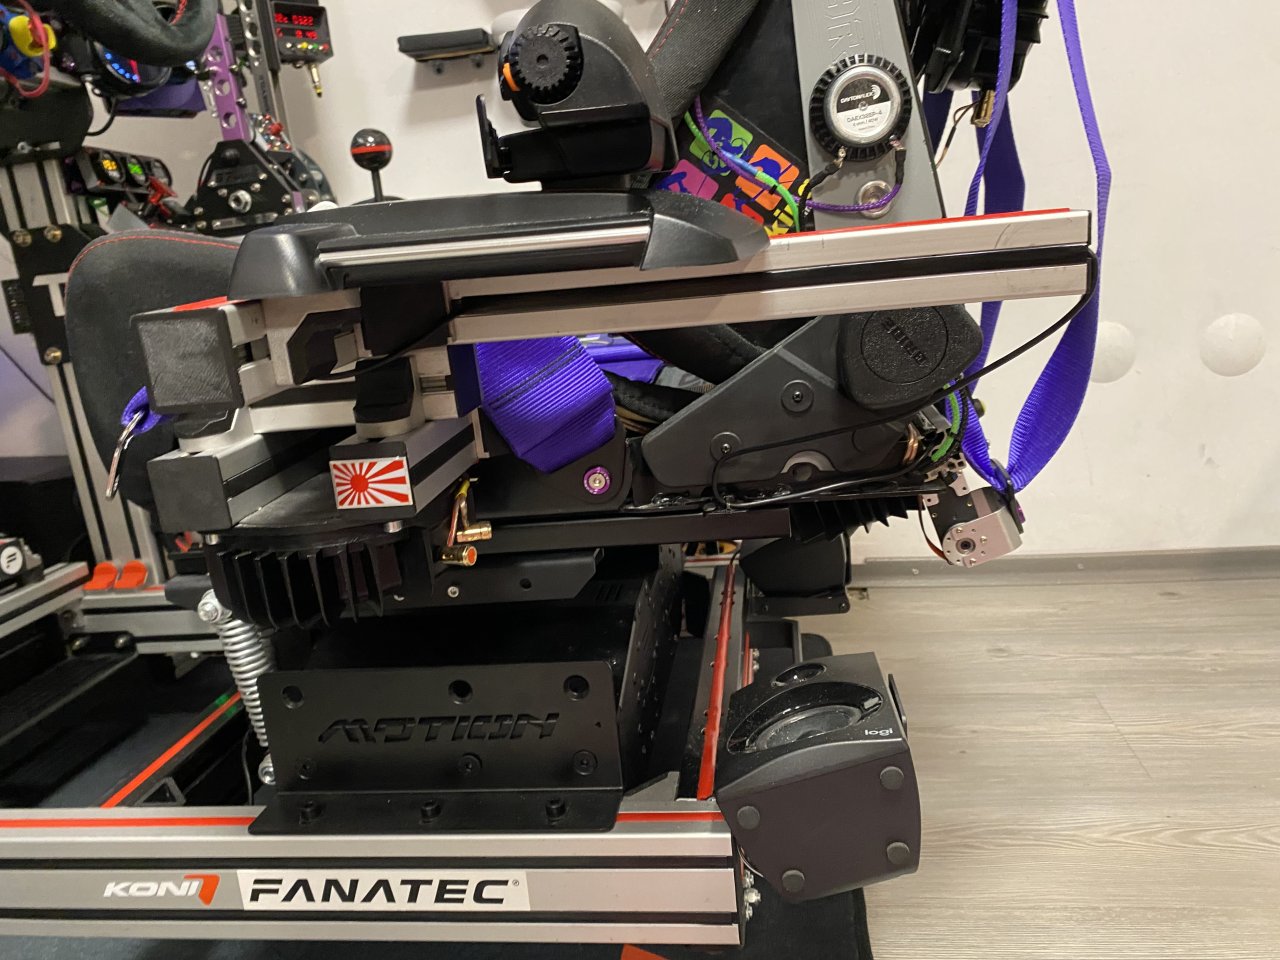
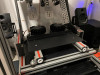
- Chassis mode with 4 Aura shakers simulating suspension
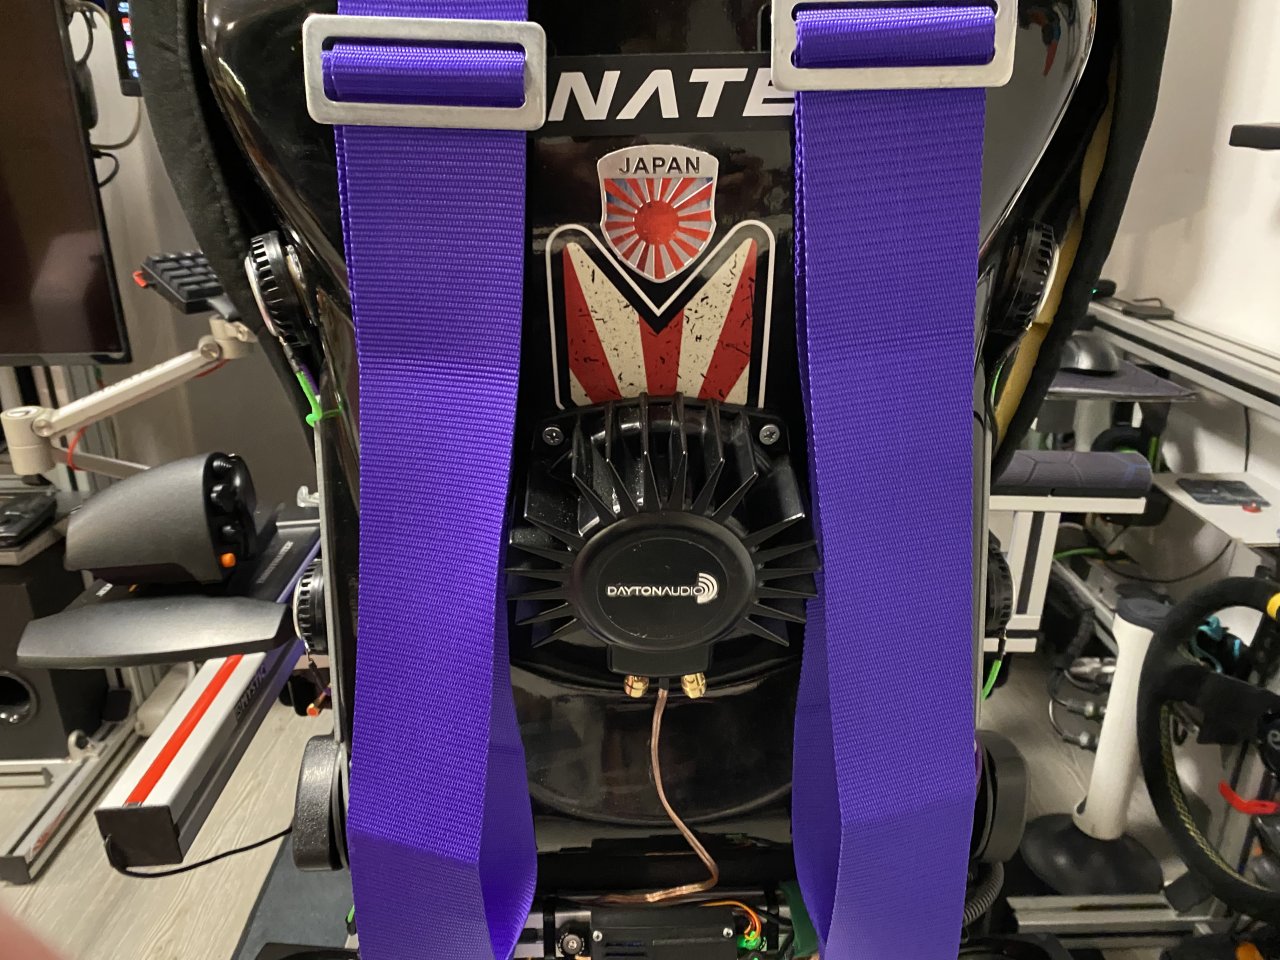
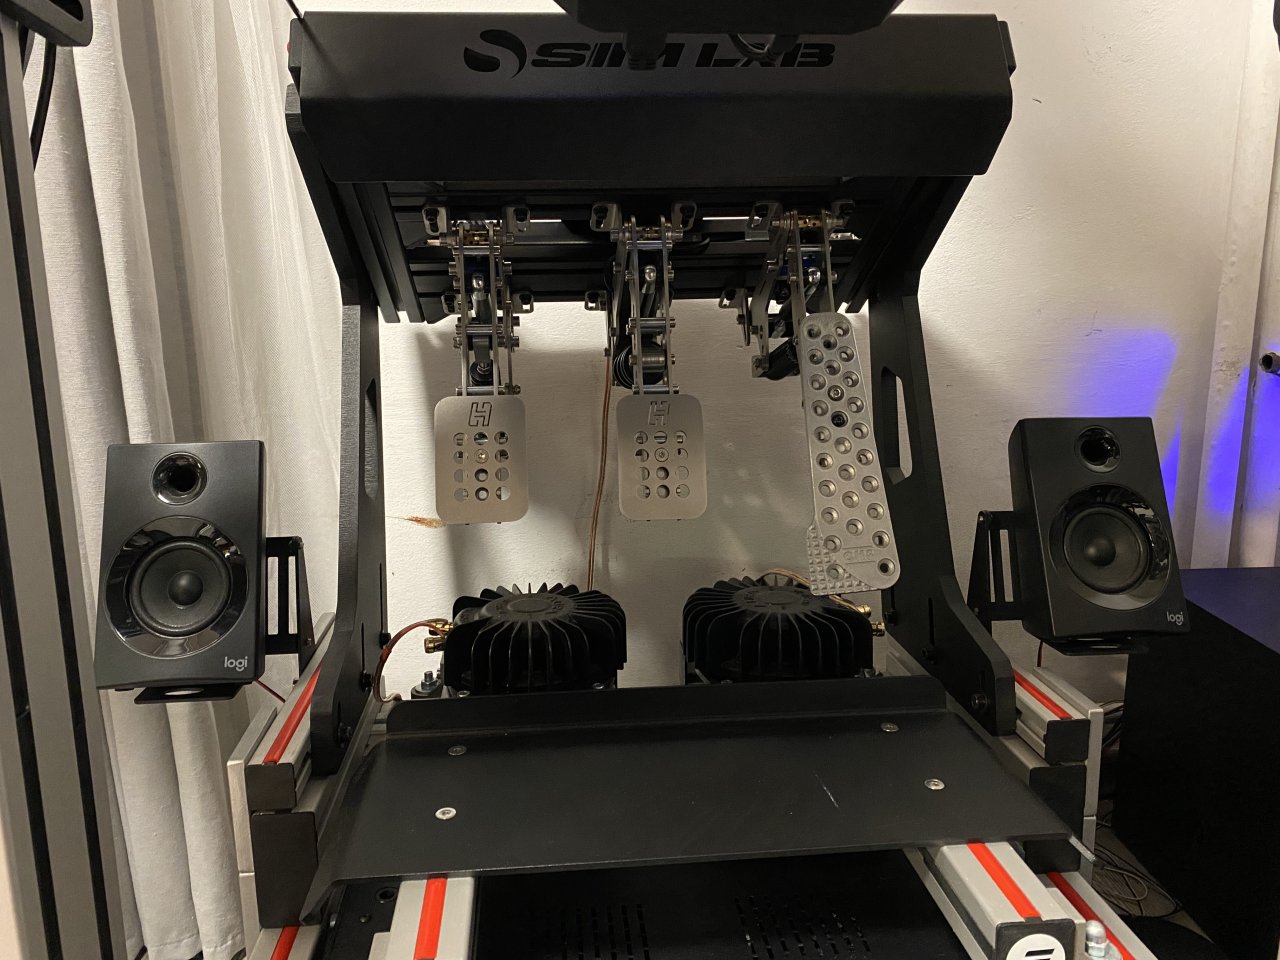
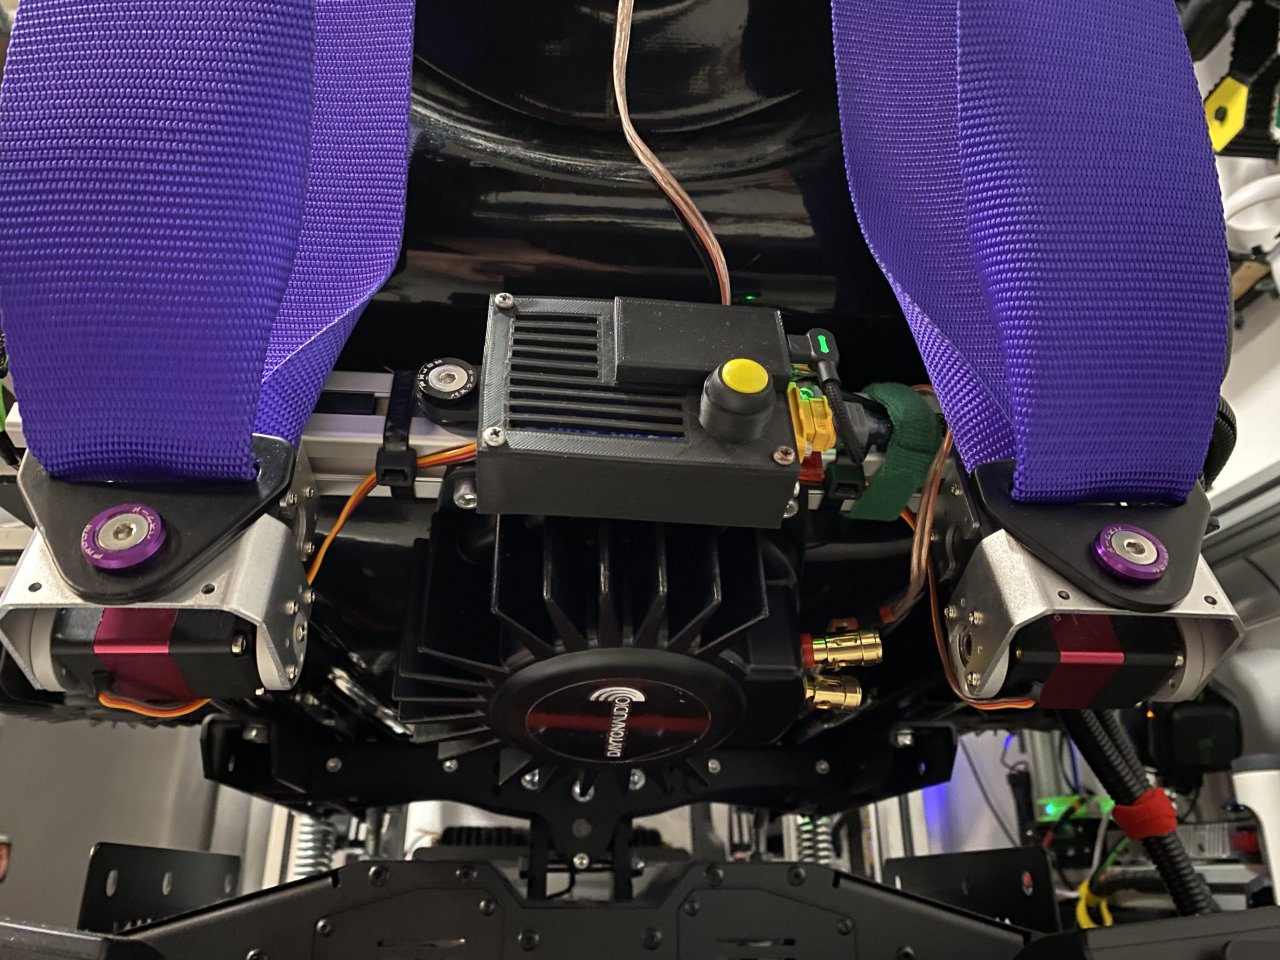
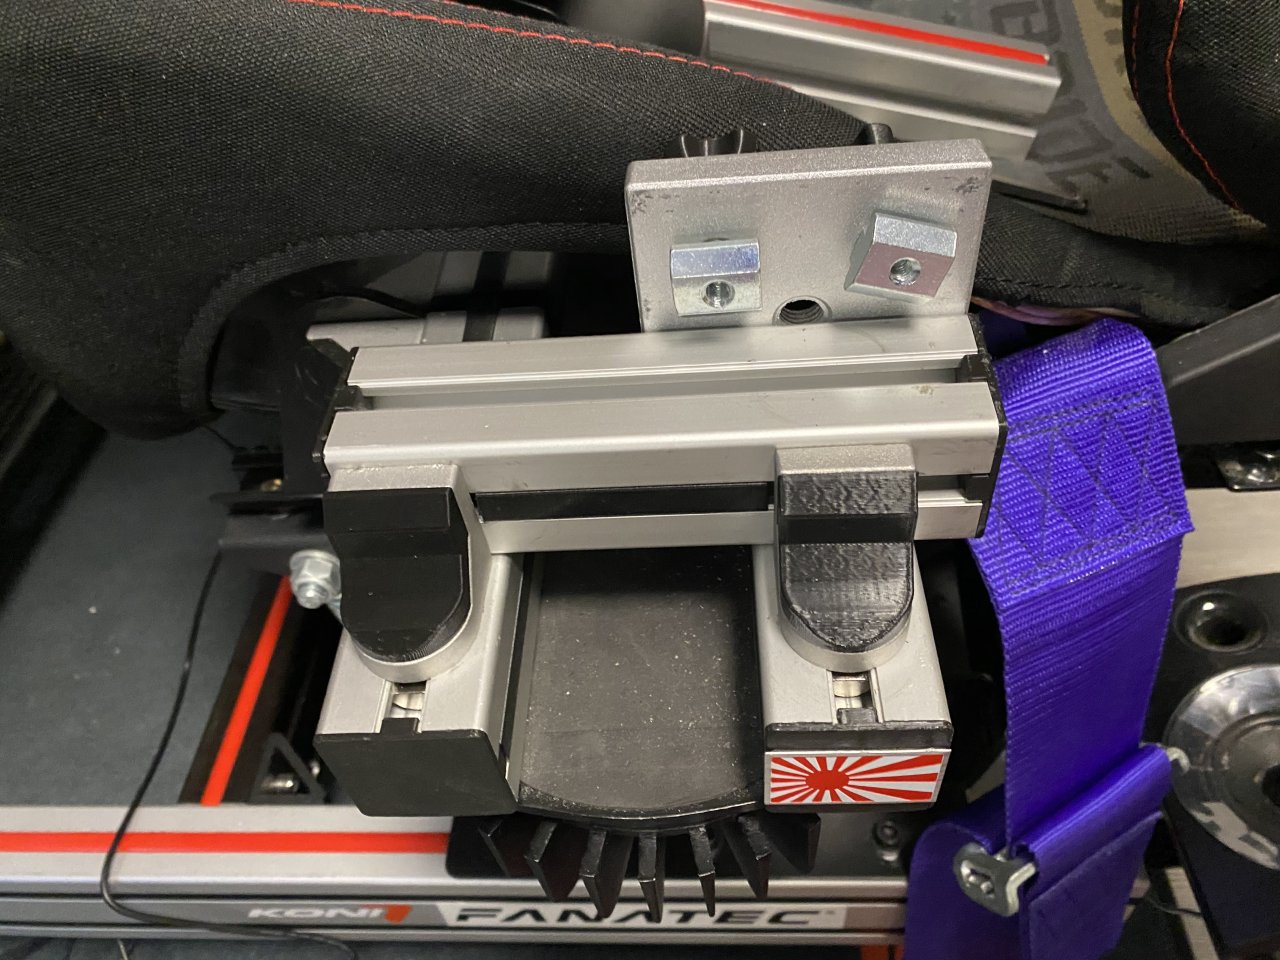
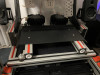
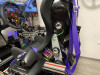
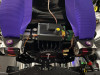
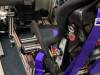
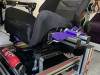
- Dayton shakers for engine, gear shift, jump landing effects - one mounted on pedal rack, two on seat (bottom and back)
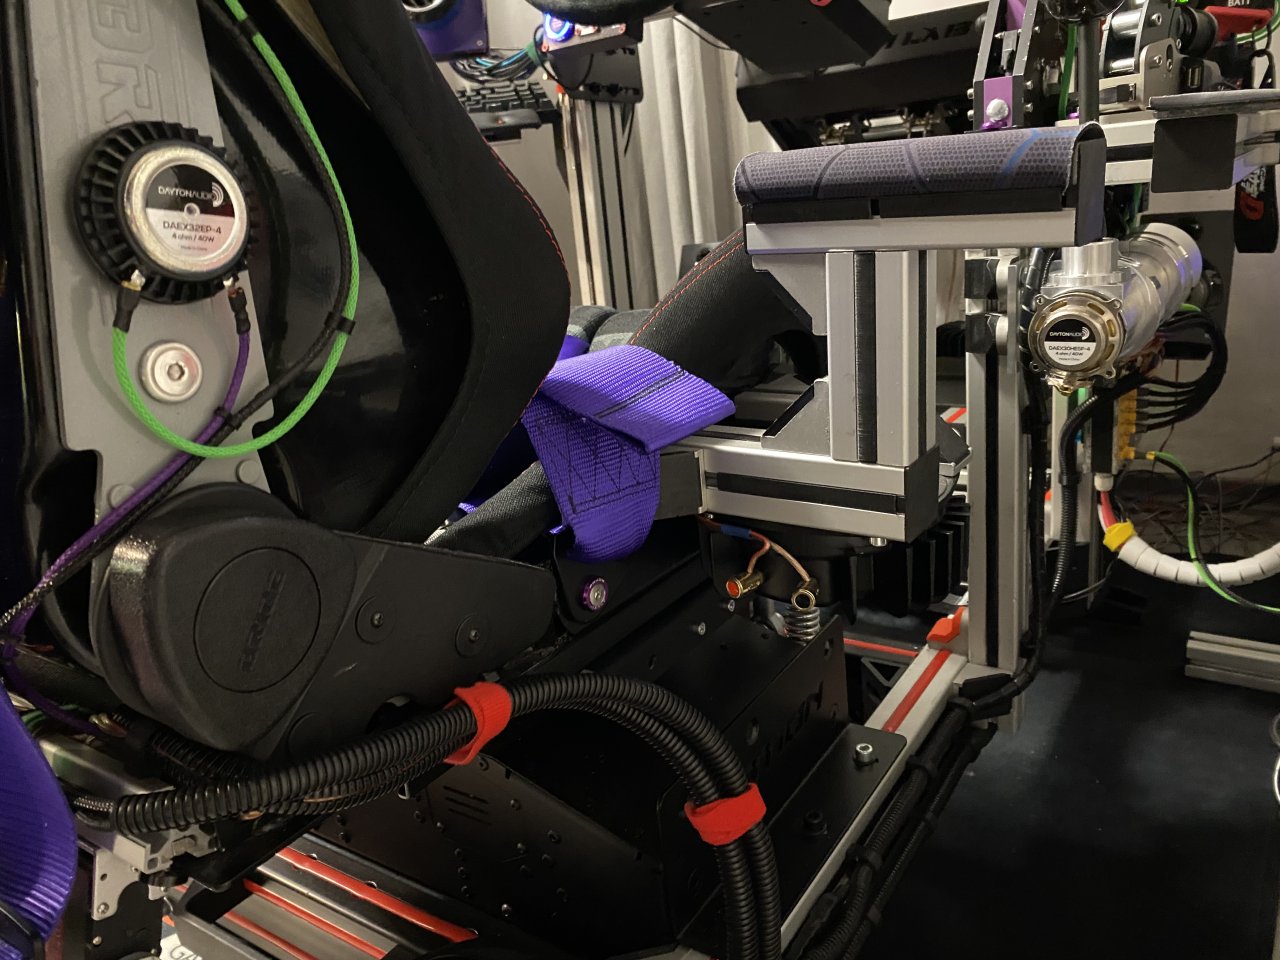
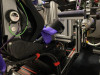
- Dayton Exciters mounted on seat for additional directional seat effects L+R - 2x per side
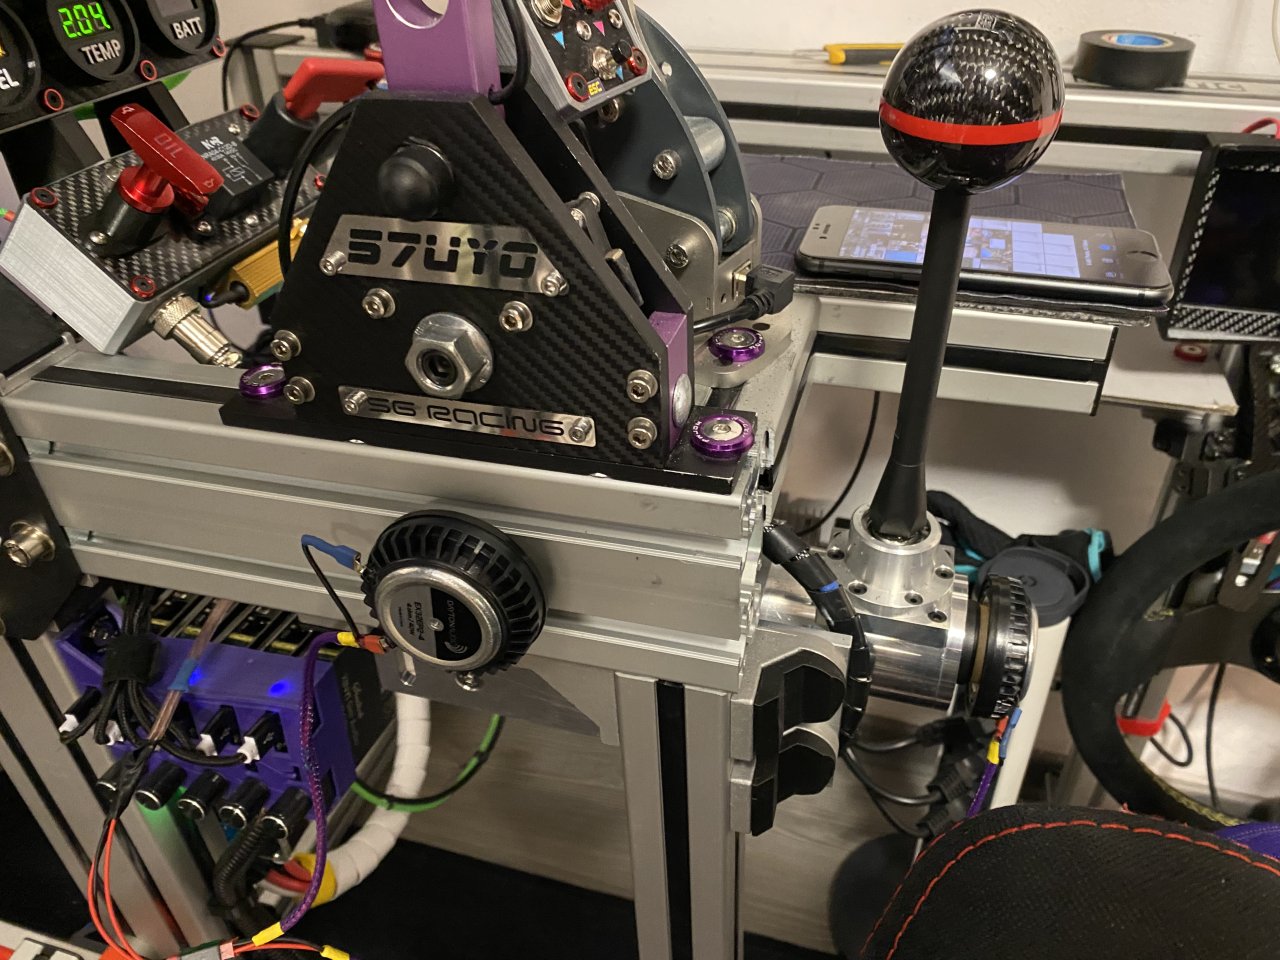
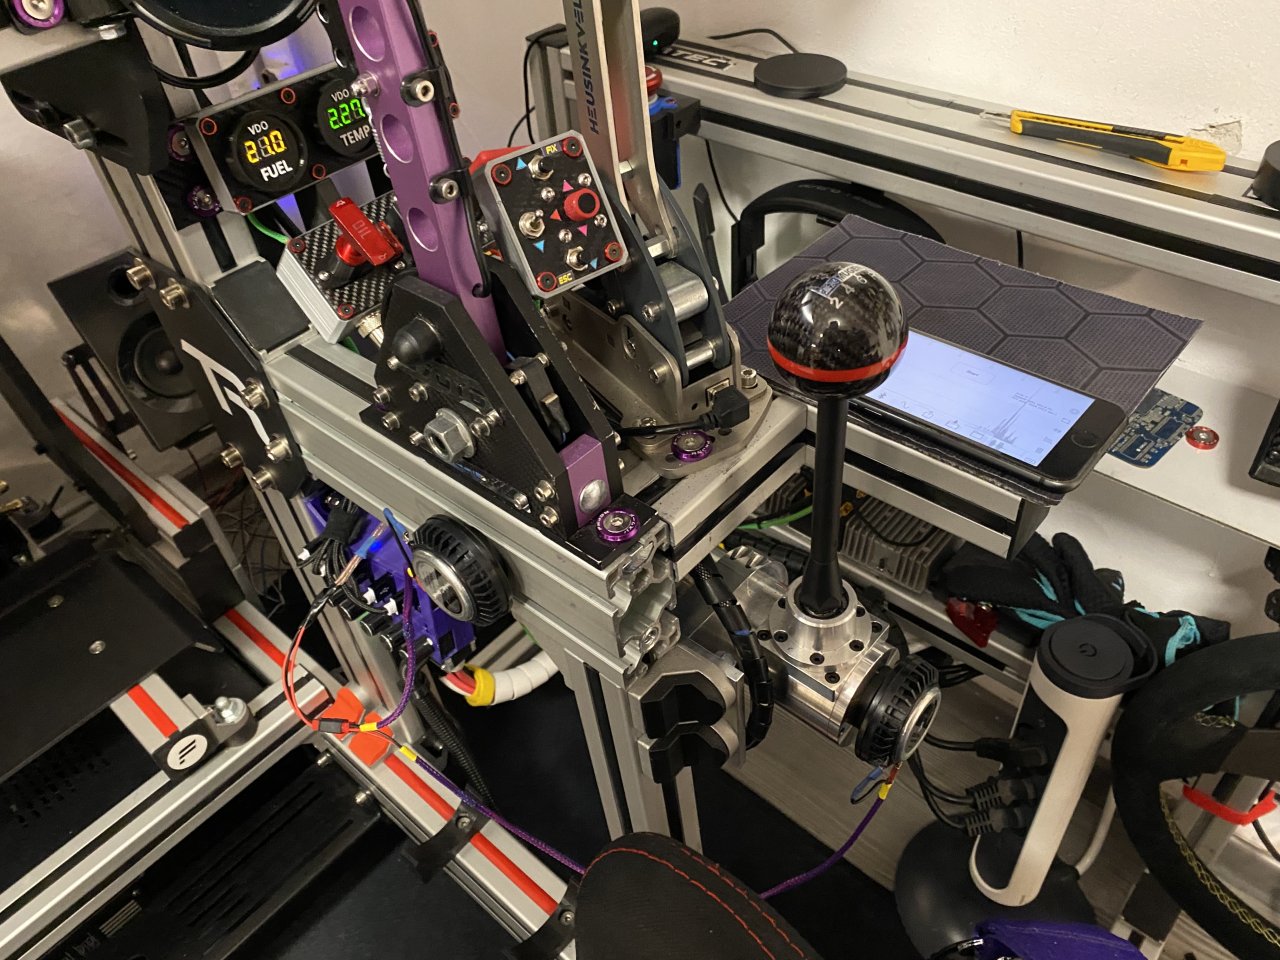
- Dayton exciters for gear effects - 2x mounted on shifter cluster
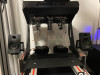
- USB Amplifiers are used - they work as Audio Device in Windows so additional is not needed
- All Volumes controlled in SimHub (as amps are USB and are directly driven)
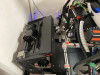
- Powered by 24V HiFi PSU with filters, 600W (used for other systems as well, more than enough power for this setup)
Important considerations
- Shakers are mounted as close as possible to where vibrations is needed
- Tried to use as rule to assign no more than 2-3 effects per channel which also do not override themselves constantly
- Where applicable proper vibration isolation is used to limit propagation and channel mixing (check linked projects for details on mounting options)
- Proper placement allows me to drive shakers at much lower volume than maximum
- Front L+R, Rear L+R at 75%, Seat Exciters are at 75%, Shifter and Front Center are at 100%, Seat Bottom and Back are at 100% but lowered per effect (for extra jump landing kick)
- Main volume controlled directly in SimHub set at 55-60% depending on game
Performance and feel
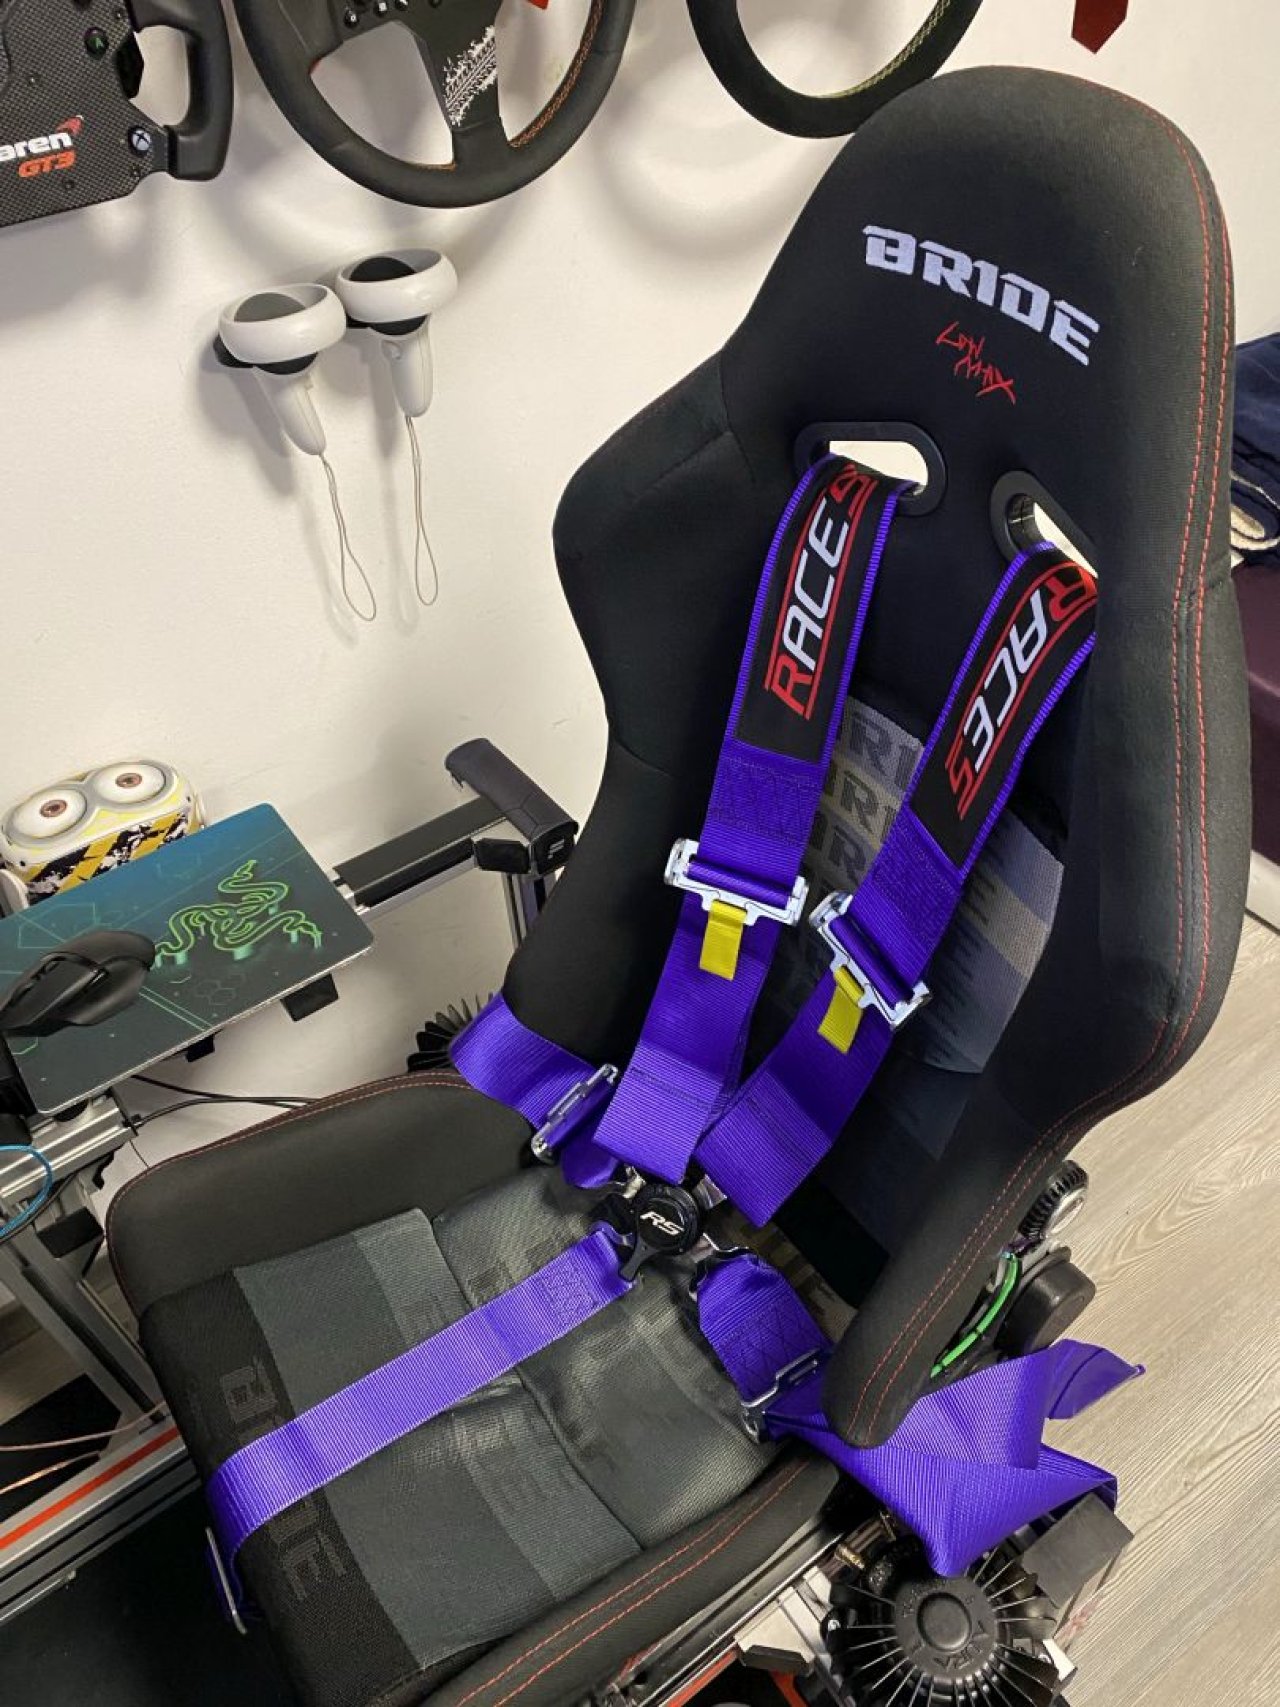
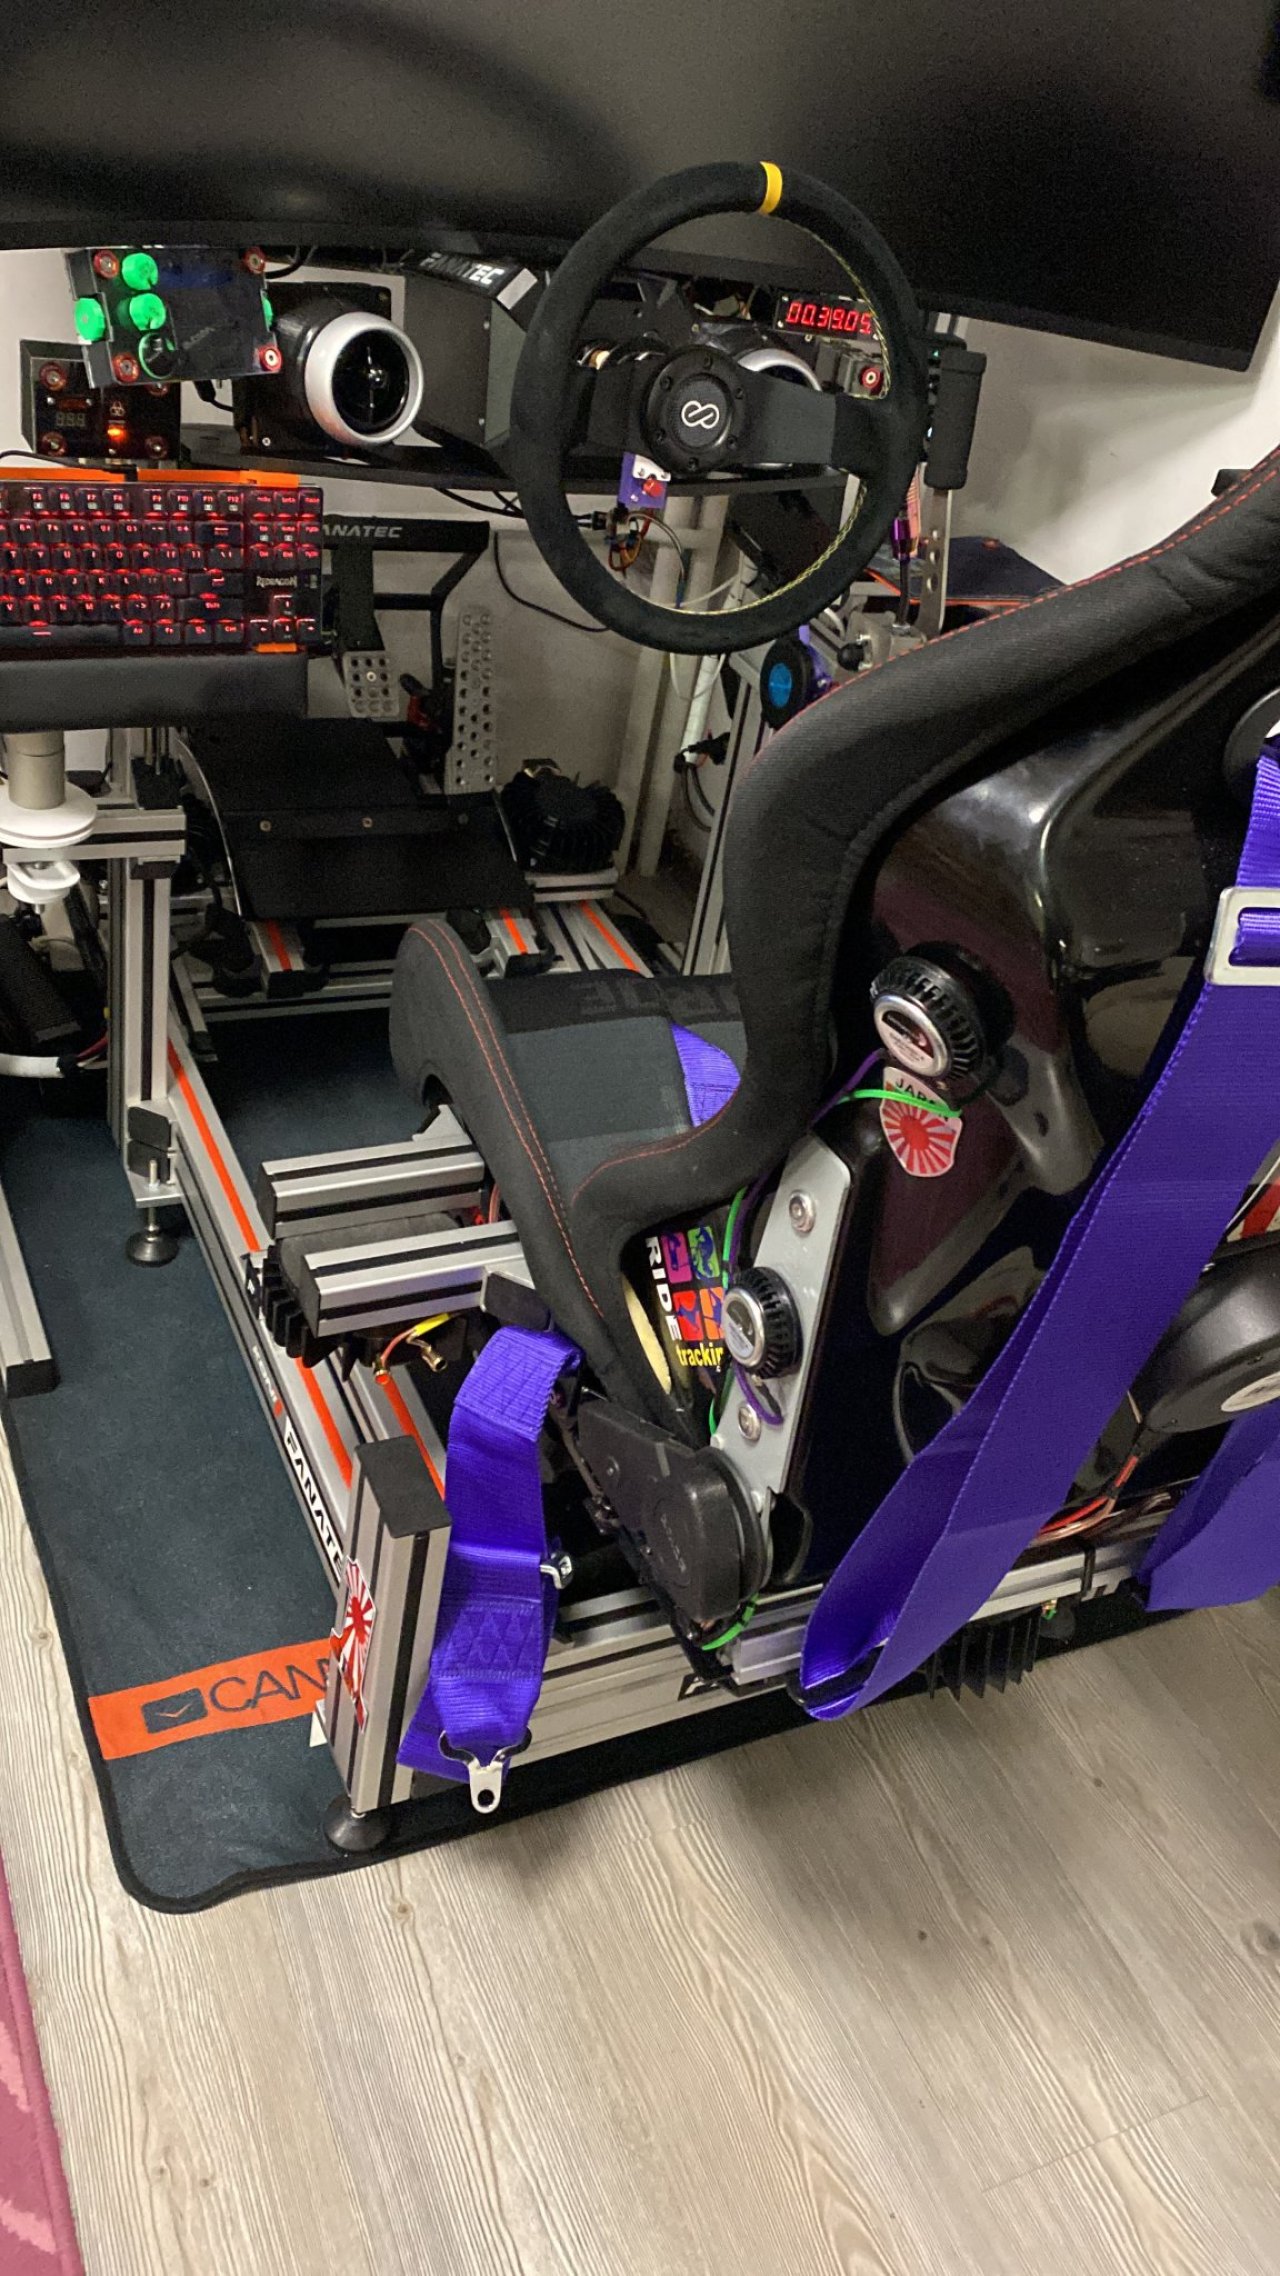
The 4 Auras in chassis mode as currently set work very consistently. Bumps in rallying, kerbs in racing - it is all there. Proper channel isolation allows me to feel every wheel separately without mixing. Jump landing also feels amazing. Racing without the shakers on is very boring now.
The central pedal and main seat shakers are for additional effects like engine sound, added jump force, gear shifting and road texture. They provide good consistency with the additional effects so you get and overall complete feeling. Do not add much information, just extend the immersion for full picture.
The side mounted exciters are good for directional effects - they add nice layer providing more information. I use them for wheel lock - not so for immersion but for providing additional information. For other effects they are overpowered by the main ones. They work OK for road texture. All constant effects like engine sound are not good there. Also powerful effects like jump landing or gear shift tend to overpower and brake them. Still testing for what else to use them, but not rely on them much. Either way add nice feel on the side of the seat back to spread evenly the tactile feel across the whole backrest.
Gear shifter exciters - this was definitely the best thing I did. CM is great with for Auras if done properly, but the feel you get every time you touch the gear shifters or handbrake is Amazaing! Engine vibrations are felt very good the way it is setup currently - when I rest my hand on the shifter I literally can feel what revs I have. The added tactile effect from gear shift is also something veeeery nice - you feel something somewhere is happening, not only the shifter itself. The additional immersion here is unmatched - this is the cheapest tactile mod that gives you best bang-for-money hands down.
Stay tuned as here will be linked all other related 3D printed projects, SimHub configs and profiles - altogether the rest of the needed info to reproduce this setup. Enjoy!
-
Effects assignment
Front + Rear, L+R channel in chassis mode: Road Vibration, Road impact for main wheel simulation. Wheel Slip and Jump Landing in override as additional effects
Seat Main Shakers: Bottom - Road texture, Jump Landing, Gear Shift; Back: Engine Sound, Jump Landing, Gear Shift
Pedals top shaker: Engine Ground, Gear Shift, Wheel Lock
Seat Side Exciters: Wheel Lock
Shifter Exciters: Engine Sound, Gear Shift, Gear Misshift
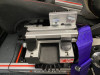
Parts Used:
1. Aura Sound AST-2B-4 Pro Bass Shaker 50W, 4Ohm - 4x in Chassis Mode - Link
2. Dayton BST-1 Bass Shaker 50W, 4Ohm - 2x for seat, 1x for pedals - Link
3. Dayton DAEX32U-4 Exciter 20W, 4Ohm - 2x in series for Shifter Cluster - Link
4. Dayton DAEX32EP-4 Exciter 40W, 4Ohm - 2x2 in series for seat L+R - Link
5. Xinyi Sini Audio XY-C100H 2x100W Amps (TPA3116D2 chips) from Aliexpress - 5x - Link
6. USB A to A Male to Male cables for the amps - 5x - From Aliexpress
7. HiFi PSU LLC 600W 24V amplifier switching power supply - From Aliexpress - Link
Hardware overview
- Auras vs Dayton BST-1s are pretty close, but prices is almost twice. This said I have better experience with the Auras - they are more powerful and have deeper low frequencies, just feel nicer. If you want to save money - Daytons are also great though. Either way if properly places you should drive them way below minimum
- Dayton DAEX32EP-4 - this is very powerful small exciter yet again is not designed to handle such application. Using it in low frequencies puts it in resonance and kills it - have broken already 4 out of 7. If used sparingly at low volume is OK. They have new model with better mounting - potentially is better but still same unit. Have two for testing but still not used them. would generally avoid using them for this purpose
- Dayton DAEX32U-4 - mi new favourite toy. On paper half the power but has bigger body than above, has stronger spring and is more massive. Produces better and stronger vibrations than DAEX32EP-4, looks much more suited for low frequencies.
- PSU 600W - mine is overprovisioned. In proper setup you should be much below the maximum power drain. Personally I am using mine at 75% SimHub Config on 60% overall volume - definitely am very far for the total 550W they are sized to drain. I bough bigger PSU as am powering with it Wind Sim, Servo Belt Tensioner, additional indicators and button boxes - basically all my auxiliary systems. Been using it for almost a year - no issues whatsoever.
- Power Amps - as stated - USB, no sound card needed, direct managing from SimHub - great! Price is unbeatable, extremely cheap from what you get. Flawlessly work with the above setup. Have very high reserve (100W per channel) - you can always cheap out and buy the 50W version. Prefer in both cases the H variant - it uses TPA3116D2 which have less noise and generally much better quality. Price difference is not that big. My tactile setup is more than year-year and half in use - zero failures, have a spare amp just in case - never get to it.

Comments (0)